

How to Prepare for Braids Before Your Appointment

A polished braid appointment starts before the first part is made. Knowing how to prepare for braids helps protect your natural hair, keeps your appointment moving comfortably, and gives your finished style the clean, lasting look you want. A little preparation also makes it easier for your braider to focus on the details that matter most: neat parts, balanced tension, and a consistent finish.
Whether you are choosing traditional braids, knotless braids, or a specialty look, preparation should feel simple. The goal is not to arrive with perfect hair. It is to arrive with hair and a scalp that are clean, manageable, and ready for your selected service.
How to Prepare for Braids Without Overdoing It
The best prep routine is usually a calm one. Avoid trying several new products, a dramatic trim, or a last-minute color service right before your appointment. Your scalp and strands respond best when they are clean, detangled, and not weighed down by buildup.
Think of braid prep as setting the foundation. Braids can look beautiful for weeks, but they are installed on the hair you bring to the chair. Starting with a comfortable scalp and detangled strands supports a better experience from the beginning.
Start with a clean scalp
Wash your hair before your appointment, paying attention to your scalp as well as your strands. Use a shampoo that removes everyday oils, sweat, and product buildup without leaving your hair feeling stripped. If you use dry shampoo, edge control, heavy oils, mousse, or a lot of leave-in products, take the time to cleanse thoroughly.
A clean scalp matters because braiding over buildup can lead to itching, flakes, and discomfort sooner than expected. It also gives your braider a clearer starting point for clean sections and polished parts.
Condition your hair after shampooing, especially if your strands tend to tangle or feel dry. Rinse well. Heavy masks, thick butters, and excess oil are not always the best choice immediately before braiding because they can leave the hair slippery or coated. If your hair needs extra moisture, choose a lighter conditioner and make sure it is fully rinsed out.
Detangle with patience
Detangling is one of the most helpful steps you can complete at home. Work in sections, beginning at the ends and moving gradually toward the roots. A wide-tooth comb, detangling brush, or your fingers can all work, depending on your texture and what your hair responds to best.
Do not rush through knots or pull against tangles. That can cause unnecessary breakage before your service even begins. If you have a particularly dense texture, recent wash-day tangles, or a lot of new growth, give yourself more time than you think you need.
Your hair does not have to be pin-straight to be braid-ready. It simply needs to be reasonably detangled from roots to ends. If there are areas that knot easily, especially at the nape or crown, make those sections a priority.
Stretch your hair if it works for you
Stretched hair can make the installation process smoother, reduce tangling, and help your braider maintain consistent sections. Blow-drying on low or medium heat with a heat protectant is one option. Banding, threading, large twists, or loose braids are heat-free ways to stretch the hair as well.
This is not an all-or-nothing rule. Some clients prefer to avoid heat, and that is completely reasonable. The right choice depends on your hair's condition, your normal routine, and the service you booked. If you do use heat, do not chase maximum straightness. A gentle stretch is enough, and preserving the health of your hair comes first.
Choose Your Braid Style Before You Arrive
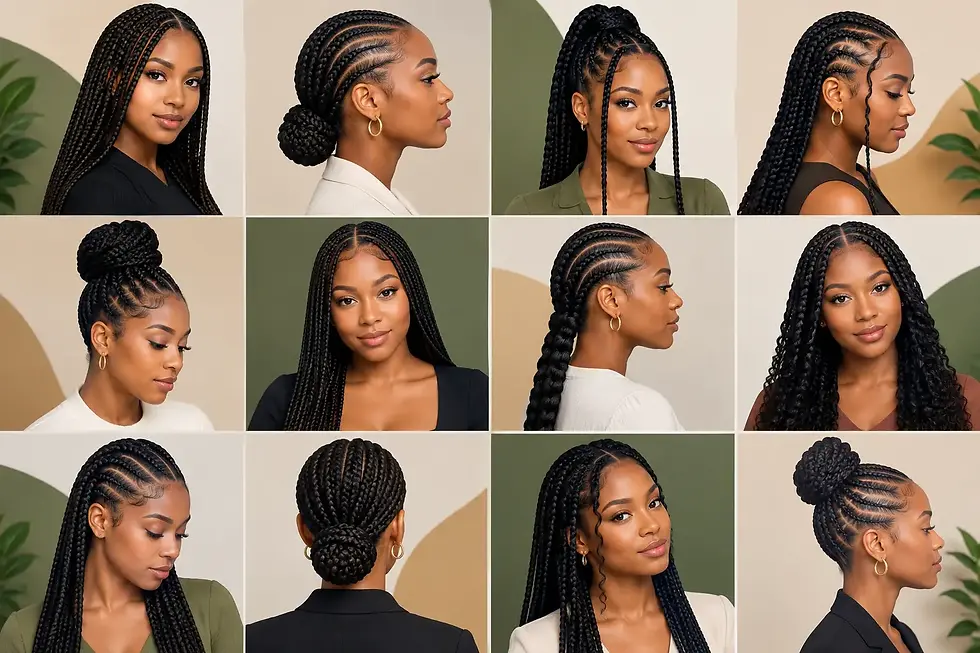
A clear style choice makes appointment day easier. Take time to consider braid size, length, parting pattern, and finish. Smaller braids can offer more styling flexibility and a detailed look, but they usually require more installation time. Larger braids are often quicker to install and remove, though they create a different overall finish.
Knotless braids are a popular choice for a lightweight, natural-looking result. Traditional braids offer a classic, defined appearance that many clients love for their structure and longevity. Neither is automatically better. Your ideal style depends on the look you want, how long you plan to wear it, and how much time you have for installation and takedown.
Save a few inspiration photos that show the actual details you like. One photo may have the length you want, another may show the braid size, and another may show your preferred parting. Photos are helpful for communicating your vision, but your finished look should also account for your own hair density, hairline, and scalp comfort.
If you want a boho finish, decide that before your visit. A human hair boho add-on can create that enhanced, textured look, but it also calls for a little more care during wear. Be realistic about whether you want a sleek, low-maintenance result or are happy to refresh and protect loose curly pieces along the way.
Confirm the Details That Shape Your Appointment
Before you head out, review your appointment confirmation and selected service. Make sure the braid length, size, and add-ons match what you have in mind. If you are unsure about a detail, address it before the appointment whenever possible rather than assuming it can be changed once installation begins.
Traditional Braids includes hair with core services, so clients can arrive focused on preparing their natural hair and confirming their desired look. If a particular style or add-on has special instructions, follow those directions closely. Bringing extra hair without being asked can create confusion around color, texture, or quantity.
Give yourself enough time to arrive relaxed. Braiding appointments can be long, especially for detailed styles or added length. Eat beforehand, bring water if you would like it, and wear comfortable clothing. A top with a loose neckline or button-front opening can be especially convenient when it is time to change without disturbing fresh braids.
Plan around your day honestly. If you have an event, a flight, or a major commitment, avoid booking so tightly that you are anxious throughout the service. A polished protective style is worth giving proper time and attention.
What Not to Do the Night Before
Avoid packing your hair with thick grease, heavy edge control, or multiple layers of styling products. These can create buildup and make it harder to assess your natural hair. Also skip tight ponytails, high buns, or styles that pull on your edges right before braiding.
Do not attempt to cut out knots, relax your hair, or use strong chemical treatments at the last minute unless that is already part of a routine guided by a professional. Fresh chemical processing can leave the scalp sensitive, and a tender scalp is not the starting point you want for a braid appointment.
If you have sores, a rash, significant irritation, or unusual scalp tenderness, it may be best to reschedule and care for the issue first. Braids should feel secure, not painful. Being upfront about scalp sensitivity, thinning areas, or a tender hairline helps create a more comfortable plan.
Set Expectations for Comfort and Longevity
A neat braid style should not require you to tolerate painful tension. Some snugness can be normal at first, particularly around a fresh part, but sharp pain, headaches, bumps, or persistent pulling are signs to speak up. Your comfort is part of a quality result.
After your appointment, protect your braids at night with a satin or silk scarf, bonnet, or pillowcase. Keep your scalp clean, use products lightly, and resist the urge to constantly pull your braids into tight styles. The same care that helps your braids look fresh also supports your edges and natural hair underneath.
When you prepare with clean, detangled hair and a clear vision for your look, you make room for the precision and attention to detail that set a braid style apart. Select the style that feels like you, schedule your appointment, and arrive ready to leave with a look you can wear with confidence.


Comments